Whenever traveling in areas where
there is an avalanche risk it is always a good idea to take 10-20 minutes
to test the snow conditions. To begin with choose a test area that
has similar slope, elevation, and snow conditions of the area you will be
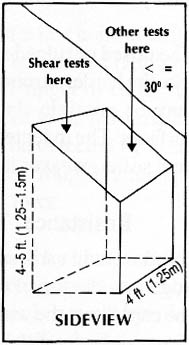
traveling in. First, dig a test pit that is four to five feet deep and
wide enough to work in. Pay attention to weaknesses between layers of
snow, and make sure that the snow above the test pit isn't disturbed.
Most human triggered avalanches are within four to five feet of the surface.
The test pit should be similar to the figure below.

Snow Sense
Stratigraphy test:
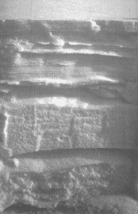
The stratigraphy test is used to identify weak bonds between layers. To perform this test, use a mitten, hat, or a whisk broom to brush away loose snow in your snowpit. By brushing away loose snow layers, the once flat surface will show the snow history and identify weak bonds between layers. Ridged and raised layers in the snowpit, are layers that have the potential of becoming part of a slab avalanche. The picture below illustrates what this test might show.
The stratigraphy test is used to identify weak bonds between layers. To perform this test, use a mitten, hat, or a whisk broom to brush away loose snow in your snowpit. By brushing away loose snow layers, the once flat surface will show the snow history and identify weak bonds between layers. Ridged and raised layers in the snowpit, are layers that have the potential of becoming part of a slab avalanche. The picture below illustrates what this test might show.

Resistance test:
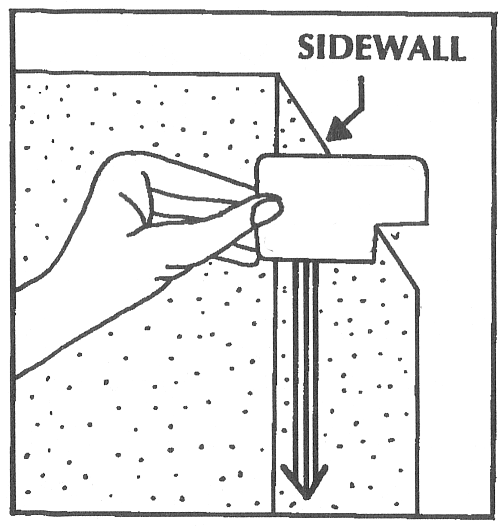
The resistance test simply identifies potential slab layers. Run a credit card, saw, or anything straight through the snow. Note any resistance that is felt. By combining this information with the straigraphy test, you now have a more information as to where the weak bonds are.
The resistance test simply identifies potential slab layers. Run a credit card, saw, or anything straight through the snow. Note any resistance that is felt. By combining this information with the straigraphy test, you now have a more information as to where the weak bonds are.
Hardness test:
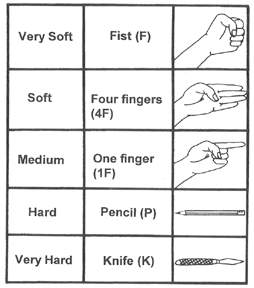
Hardness tests combined with the information above can provide additional information as to the strength of the snow layers. The chart below gives classifications of hardness. In general strong layers are hard, while soft layers are weak. However, this is not always the case. Additional test can be performed to confirm. For more information on testing snow stability you can go to the following web site: http://www.uoregon.edu/~opp/snow/avalanche/stability_eval.htm.
Hardness tests combined with the information above can provide additional information as to the strength of the snow layers. The chart below gives classifications of hardness. In general strong layers are hard, while soft layers are weak. However, this is not always the case. Additional test can be performed to confirm. For more information on testing snow stability you can go to the following web site: http://www.uoregon.edu/~opp/snow/avalanche/stability_eval.htm.

Snow Sense
